TECHNICAL INFO
Measuring Specification
In order to identify specification for inquiries and orders, please refer to the following steps.
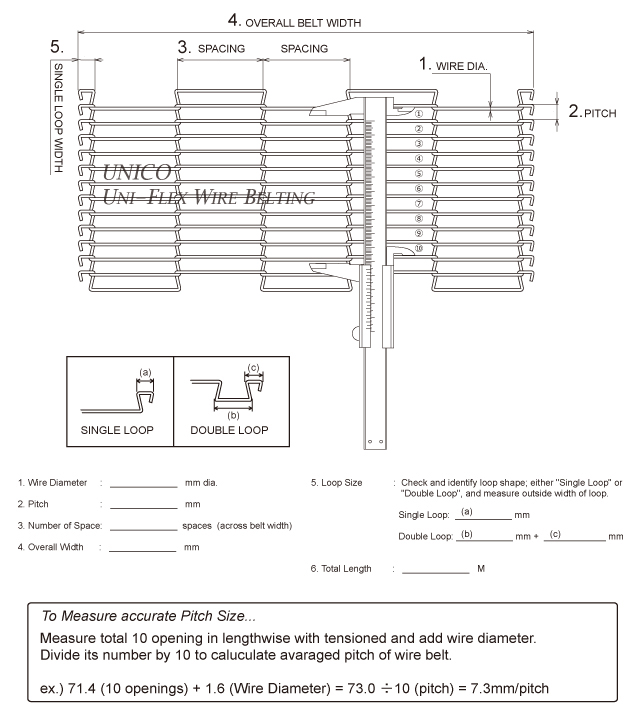
Please give us detailed conveyor working condition and product be carried in case you are looking for suitable specification for new conveyor system
How to Endless Uni-Flex wire belt
Manual Endless
|
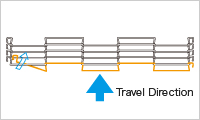
- step1
- Remove one piece of wire rod from tail end of belt.
Check the strand direction. The end loop of strand should be in the same direction as the belt end loops.
|
|
- step2
- Bend and Insert the strand in the center of space of wire belt.
|
|
- step3
- Let the straight part of strand bend and curve to interweave the belt.
Try not to twist and deform the shape of Z-bend.
|
|
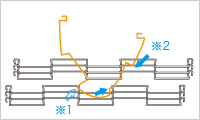
- step4
- Insert (※1) arrow marked and push the other side into the belt. Interlock it at (※2) arrow marked point wtih two pliers.
|
|
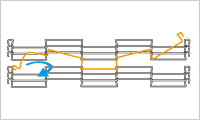
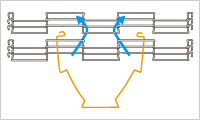
- step5
- Straighten the center space of strand. Insert one side of strand to interlock 2nd space next to center space.
|
|
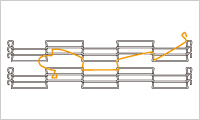
- step6
- Insert around Z-bend as illustrated to interlock perfectly. Straighten the wire. Repeat this procedure till the last space next to end loop.
|
|

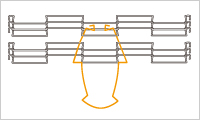
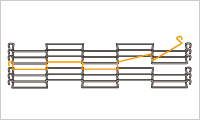
- step7
- Straighten the wire belt roughly. Finish the endless one side completely before starting the opposite side.
|
|

- step8
- Put the end loop into the way directed by arrow, and hook up with another end loop.
|
|
- step9
- Do the same procudure for the other side of belt and straighten the rod completely.
|
Applying Joint Sleeve (tubular pipe)
|
|
|
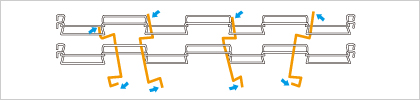
- step1
- Remove a wire rod. Cut even number of spaces of the strand at 3 to 7 where is the position that sprockets and rails are not located.
|
|
|
|
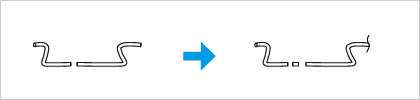
- step2
- Cut out about 2mm length of the cut piece as illustrated below.
|
|
|
|
- step3
- Insert cut strands into belt. **Insert a long rod end first.
|
|
|
|
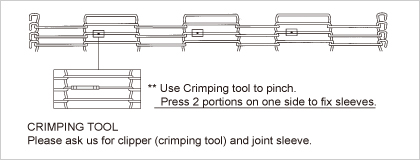
- step4
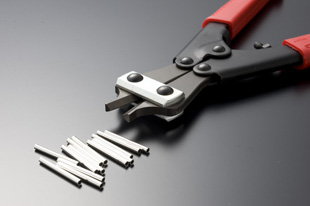
- Insert joint sleeve into the cut rods and crimp tightly.
Check carefully the belt face and back when inserting the cut rods.
|
We handle the special clipper (crimping tool) and joint sleeve. Please feel free to contact us for details. |
|
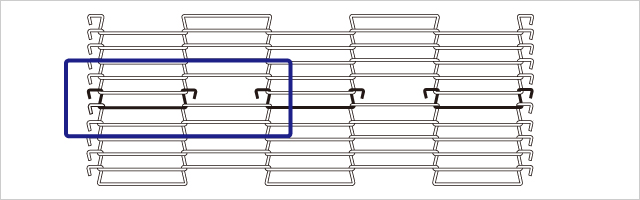
SPACE SPLICING JOINT
|

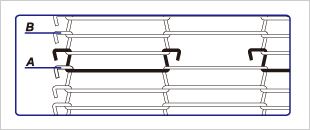
- 1.Set belts on conveyor with face side (flat-surface) up. Make sure splicing joint piece also has face and back.
- 2.Insert one side of joint piece shown as the above.
|
|
- 3.Connect other side likewise by using pliers.
- 4.Each splicing joint should hook at odd columns of spacing.
|


